Summer is in full bloom, and many of us are happily pottering around our yards with shovels and watering cans. While gardening can be a relaxing pastime, it can also place unexpected demands on the body and lead to injuries like sprains and strains.
Many people underestimate the physical demands that gardening can place on their bodies. Understanding these risks and taking proactive measures to prevent injuries is crucial for maintaining a healthy gardening experience. In this blog, we will go over common gardening injuries and provide preventative tips from our physiotherapists.
Common Gardening Injuries
Gardening activities often involve repetitive movements, bending, and lifting, which can lead to sprains and strains. Sprains occur when ligaments are overstretched, causing pain, swelling, and limited range of motion. Conversely, strains result from overstretching or tearing of muscles or tendons, leading to similar symptoms.
The lower back, knees, and shoulders are particularly susceptible to injuries during gardening. The repetitive bending and lifting motions involved in raking, hoeing, and lifting pots can strain the lower back. Kneeling and prolonged squatting can also put excessive pressure on the knees. Shoulders can also be stressed by repetitive lifting, raking, and hoeing.
7 Tips To Prevent Gardening Injuries
Whether you’re a long-time green thumb or picking up a trowel for the first time, it’s important to be mindful of your body when you’re toiling in the garden. Here are a few tips to help maximize your time in the yard — and minimize your time recovering on the couch.
1. Stay active and build strength throughout the year
Cold weather and icy streets make it hard to stay active during the winter months, and many of us are eager to get moving when spring rolls around. But being sedentary increases your likelihood of getting injured during any physical activity, including gardening. Here are some tips from our physiotherapists to help you stay active and build strength year-round:
- Indoor exercise: During the winter months, engage in indoor activities that promote strength, flexibility, and cardiovascular health. Try activities like yoga, pilates, swimming, strength training exercises using resistance bands and dumbbells, or even walking on a daily basis is great. It’s important to note that there is much more to winter exercising than just
these few exercises, but they will certainly give you a good start. It’s essential to find a routine that suits your fitness level, age, and personal preferences. Remember to consult with a healthcare professional or fitness expert before starting any new exercise program, especially if you have any pre-existing conditions. Below are some great exercises to start with:
Incline push-ups
Place your hands on an elevated surface, such as a sturdy table or countertop, and position your feet a step or two behind you. Lower your chest towards the surface, then push back up, engaging your chest and triceps. Aim for 3 sets of 8-10 reps of incline push-ups, 2-3 times per week.
Bicep curls
Stand with a dumbbell in each hand, palms facing forward. Keeping your elbows close to your body, slowly curl the weights up towards your shoulders, engaging your biceps. Lower the weights back down and repeat for a set of controlled bicep curls. Perform 3 sets of 10-12 reps of bicep curls with a challenging weight, 2-3 times per week.
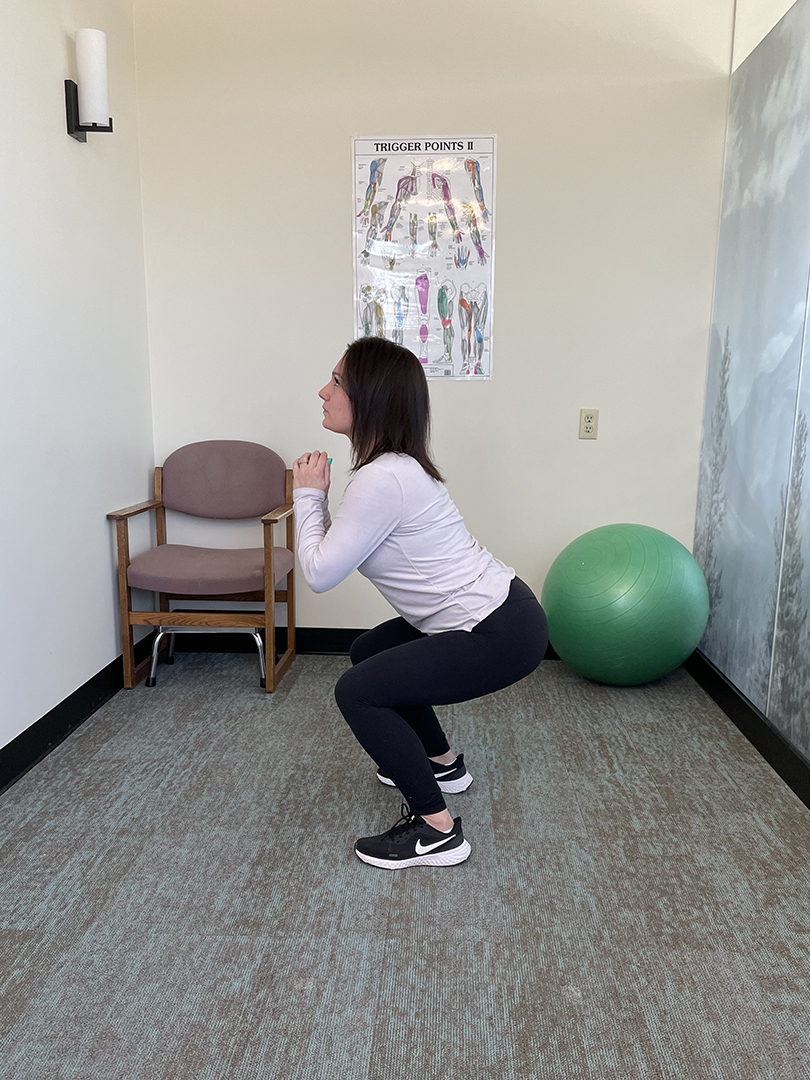
Regular squat
Stand with your feet shoulder-width apart and toes slightly turned out. Bend your knees and lower your hips down as if sitting back into an imaginary chair. Keep your chest lifted and your weight on your heels, then push through your heels to stand back up(as shown in the image below). Start with 2-3 sets of 10-12 reps of regular squats, gradually adding resistance or weight, 2-3 times per week.
Bridges
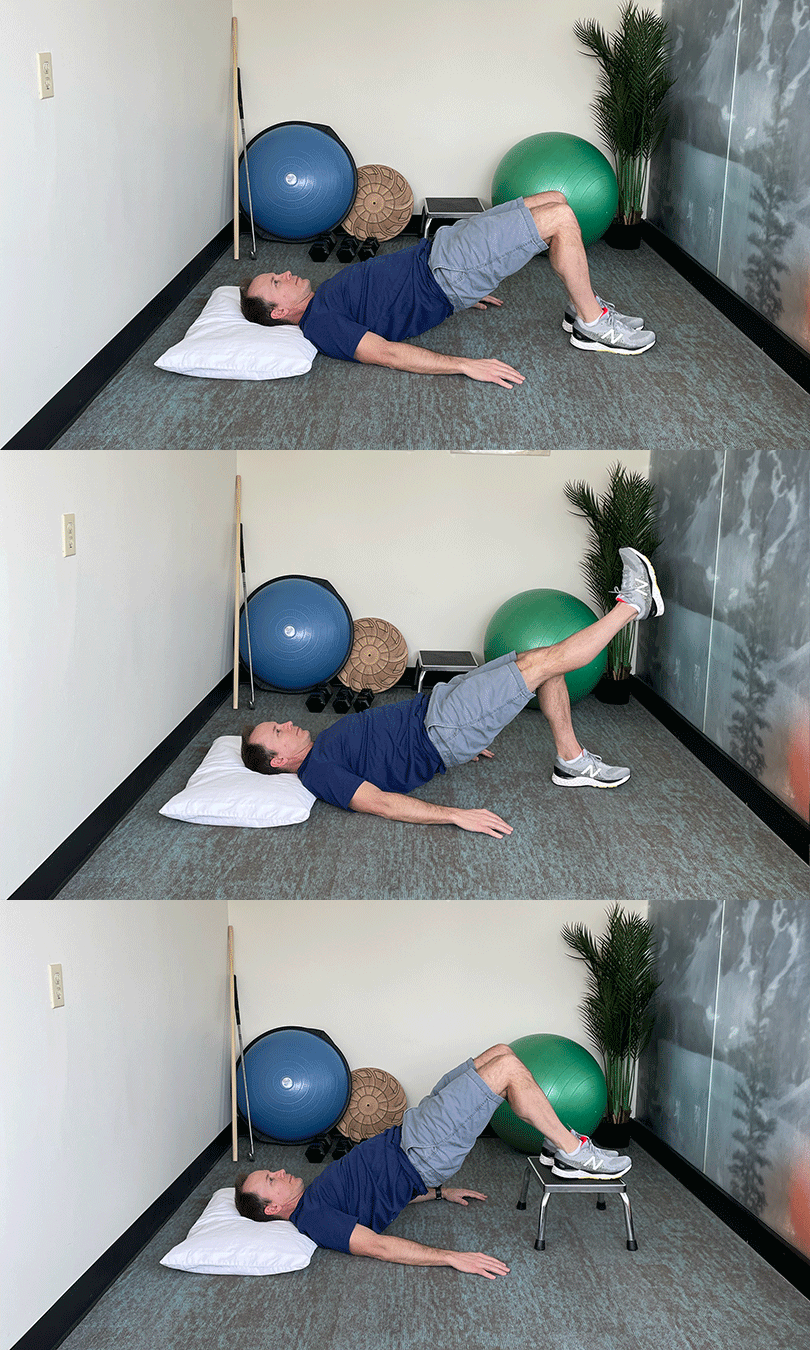
Lie on your back with your knees bent and feet flat on the ground, hip-width apart. Engage your glutes and core, then lift your hips off the ground until your body forms a straight line from your knees to your shoulders. Hold for a moment, then lower your hips back down (as shown in the image below). Do 3 sets of 10-12 reps of bridges, holding the lifted position briefly, and incorporate them into your routine 2-3 times per week.
- Balance and core exercises: Incorporate exercises that target your balance and core stability.
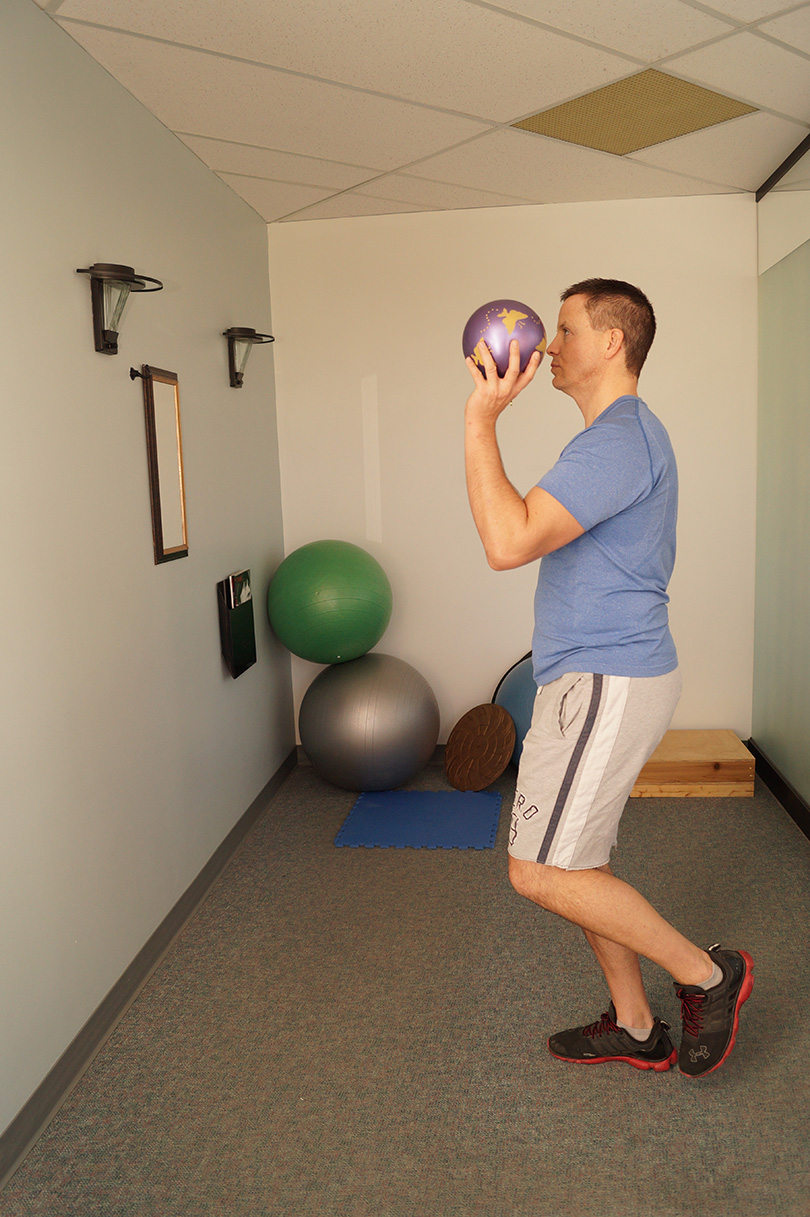
- Incorporate a daily balancing exercise into your routine. For instance, try this simple exercise: stand on one leg and use a lightweight ball. Throw the ball against a wall, catch it, and pass it from one hand to the other beneath the non-weight-bearing knee (as shown in the image below).
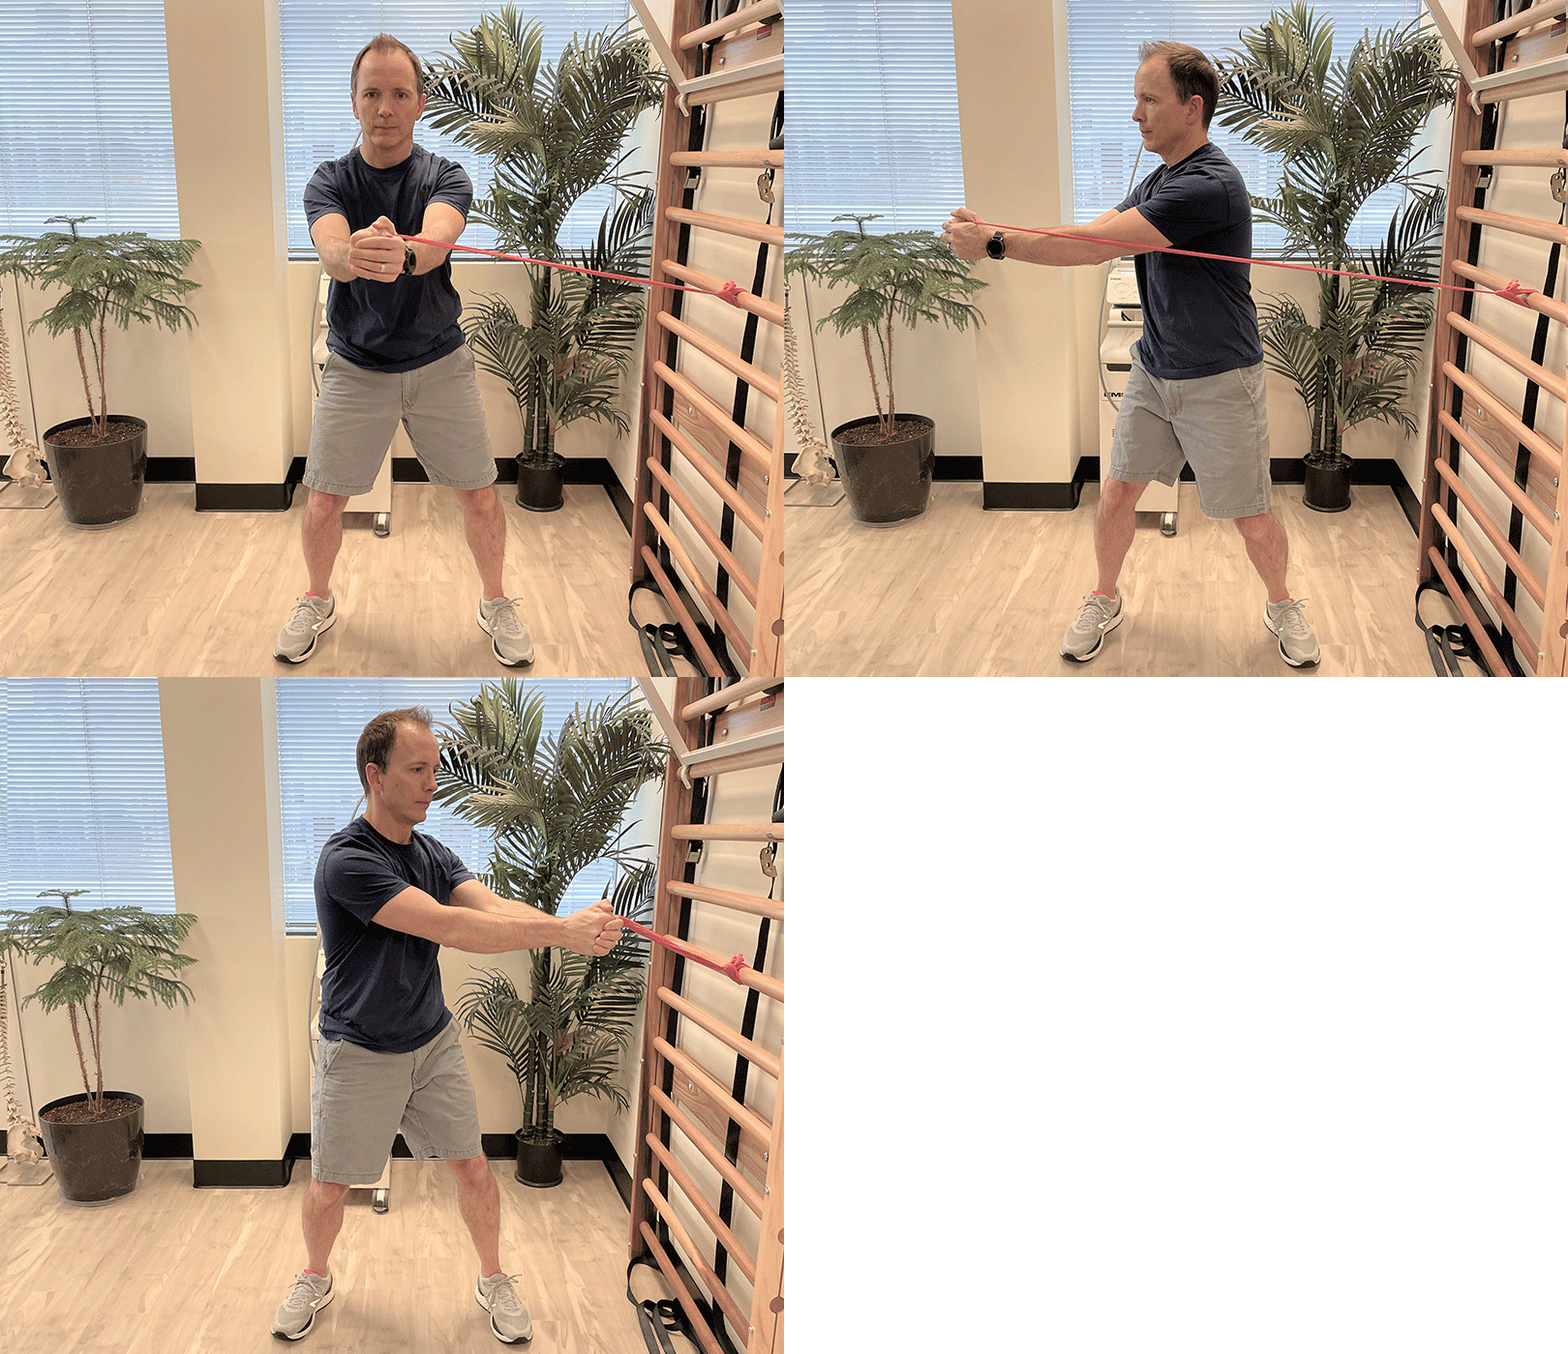
- Standing Resisted Twists: Attach a resistance band to something secure such as a banister and hold onto it with both hands. Stand in an athletic position with your knees slightly bent and your weight on the balls of your feet. Keep your back straight and tighten your stomach muscles. Partially straighten your arms in front of you. Turn your trunk slowly to the right and then to the left, moving from approximately the 10 o’clock position to the 2 o’clock position. Have enough tension in the band that it always remains tight. Make sure to rotate your trunk when turning, do not move your shoulders. Turn around and do the same facing the other direction (as shown in the image below). Aim for 10 reps per side, 2-3 sets.
- Incorporate a daily balancing exercise into your routine. For instance, try this simple exercise: stand on one leg and use a lightweight ball. Throw the ball against a wall, catch it, and pass it from one hand to the other beneath the non-weight-bearing knee (as shown in the image below).
- Seek professional guidance: Consider visiting our physiotherapy clinic for personalized advice from our experienced physiotherapists. We can assess your strengths, weaknesses, and mobility, and provide a tailored exercise plan to prevent gardening injuries. Take proactive steps and book a consultation today!
2. Ease into gardening & take breaks
To prevent injuries, it’s crucial to ease into your gardening routine and give your body time to adapt.
Follow these tips to ease into gardening effectively:
- Start with smaller and lighter gardening tasks and gradually increase the duration and intensity over time.
- Spread out your gardening chores over several days or weeks rather than working for hours on end in a single day.
- Make sure to take frequent breaks when you’re feeling fatigued, pain, or discomfort. Begin with shorter work sessions, such as 20-30 minutes, and gradually increase the duration as your stamina improves.
- Alternate between different gardening activities to distribute the workload across muscle groups.
- Stay hydrated and well nourished, and protect yourself from direct sun.
- Listen to your body’s signals and stop if you experience pain or discomfort. Don’t hesitate to ask for help or seek assistance with heavy or strenuous tasks. It’s better to divide the workload or seek assistance than to risk injury by overexerting yourself.
By following these tips, you can set yourself up for success in the garden. Create a game plan based on the tasks you want to accomplish, ensuring you pace yourself and prioritize your well-being throughout the process.
3. Warm up before gardening
Like any other activity, gardening is safer when your muscles are warm. Prime your body for gardening by doing one of the following:
- Dynamic exercises: Perform 10-20 shallow lunges and squats to activate and warm up your lower body muscles. These movements help increase blood flow and flexibility in your legs and hips.
- Take a brisk walk: Before starting your gardening tasks, take a 10-minute walk around your yard or neighbourhood. This helps elevate your heart rate and warms up your entire body.
While gardening, try to keep moving and avoid holding the same position for an extended period. Regularly change your posture, shift your weight, and take short walks between tasks. This promotes circulation and prevents stiffness.
4. Use good posture and form
Maintaining proper posture while gardening is super important to keep your muscles and joints happy. Here are some tips to help you with that:
- Stand tall with your shoulders back and down, avoiding any slouching or hunching over. Keep your spine aligned and distribute your weight evenly.
- When looking down, nod your head by bringing your chin gently to your throat and keeping your neck as vertical as possible. Avoid dropping your head down as this puts a lot of strain and stress on the back of your neck.
- Before diving into gardening tasks, engage your core muscles by gently pulling your belly button towards your spine. This gives your spine the stability it needs and supports your lower back. Plus, it’s great for overall posture and balance.
- When lifting heavy objects like pots or bags of soil, remember to use proper lifting techniques to protect your back. Bend at the knees and hips while keeping your back straight. Let your leg and arm muscles do the heavy lifting instead of relying solely on your back. It’s a good idea to engage your core muscles here too.
- Don’t stretch yourself too far! Overreaching can strain your muscles and increase the risk of injury. Stick to tasks that are within comfortable reach. If you need to reach further, grab gardening tools with long handles to avoid excessive stretching while maintaining a good posture.
- Repetitive tasks like digging or weeding can put strain on one side of your body. To prevent overexertion and muscle imbalances, make sure to switch sides regularly. It’s all about distributing the workload evenly and keeping things in balance.
By practicing good posture and form, you’ll not only protect yourself from injuries but also ensure a more enjoyable gardening experience. So, stand tall, engage those core muscles, and find your gardening groove!
How can you safely lift heavy bags of soil or pots to avoid injury?
Before you lift, test the weight first — if it feels too heavy, use a wheelbarrow or ask for help. Stand close to the object, bend your knees and hips (not your back), and keep the load close to your body as you straighten up. Engage your core and avoid twisting; instead, turn your whole body with your feet. Taking a few seconds to lift properly can make a big difference in preventing back or shoulder strain.
5. Protect your back and knees
When you’re out in the garden, it’s essential to give some extra attention to your back and knees. They can be quite vulnerable during gardening activities. But don’t worry, with a few simple techniques, you can protect these important areas and minimize the risk of injury.
One handy trick is to use supportive tools and accessories. Have you tried kneeling with cushioning or using knee pads? They provide excellent support and help reduce strain on your back and knees. Another option is to use a gardening stool or seat for added comfort and stability.
When it’s time to bend down for tasks like planting or weeding, here’s a helpful reminder: bend at your knees and hips instead of at the waist. It’s an easy adjustment that takes the pressure off your lower back and keeps everything aligned properly.
If any kind of bending or squatting is difficult, raised garden beds are a great idea. All your planting, watering and weeding are done slightly above waist height to prevent stress on your back and knees.
6. Use proper tools
Selecting the right tools can make a world of difference when it comes to preventing injuries while gardening. Here are some tips to keep in mind:
- Opt for ergonomic features: Look for gardening tools that are designed with ergonomic features. These tools come with comfortable handles that provide a better grip and reduce strain on your wrists and hands. They are specifically crafted to minimize discomfort and promote proper body mechanics while you’re working away in your garden.
- When possible, choose tools with long handles: Long-handled tools, such as rakes and hoes. Allow you to maintain a more upright posture as you work, which means less bending and reaching. This little adjustment can work wonders in protecting your back and minimizing strain on your muscles and joints.
- Use a wheelbarrow or cart: Instead of going for the direct heavy lifting approach, consider using a wheelbarrow or cart to transport those bulkier loads. By doing so, you can distribute the weight evenly and spare your back from unnecessary strain and potential injuries. Just make sure that your wheelbarrow or cart is in good condition and properly balanced to avoid any unexpected tipping incidents.
7. Stretch and rest after gardening
It’s important to take care of your body before and after gardening to prevent muscle strain and promote recovery. Incorporating stretching exercises into your gardening routine can help loosen muscles and ligaments. Here are a few simple stretches to try:
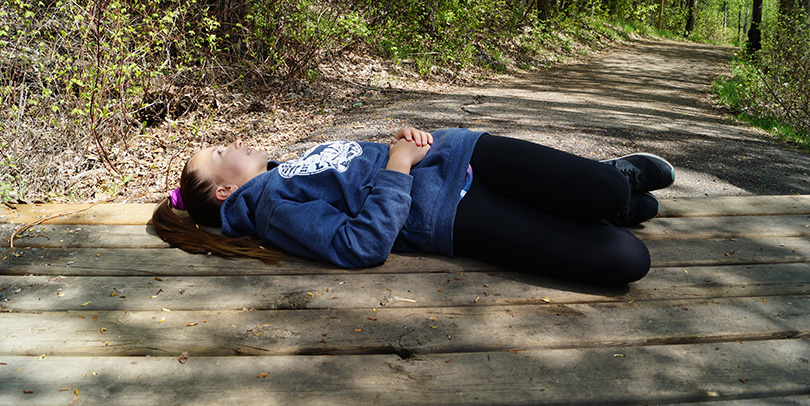
Windshield wiper stretch
Lie on your back with both knees bent, feet flat on the floor, and ankles and knees touching. Drop both knees to the floor in one direction, then do the same on the other side. Hold for 30 seconds. Repeat 3 times on each side.
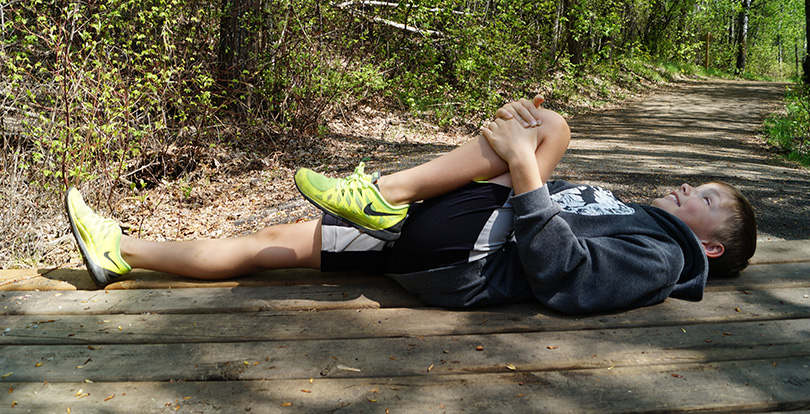
Single knee to chest stretch
Lie on your back and pull one or both knees tight to the chest. Hold for 30 seconds, repeat 3 times on each side, twice a day.
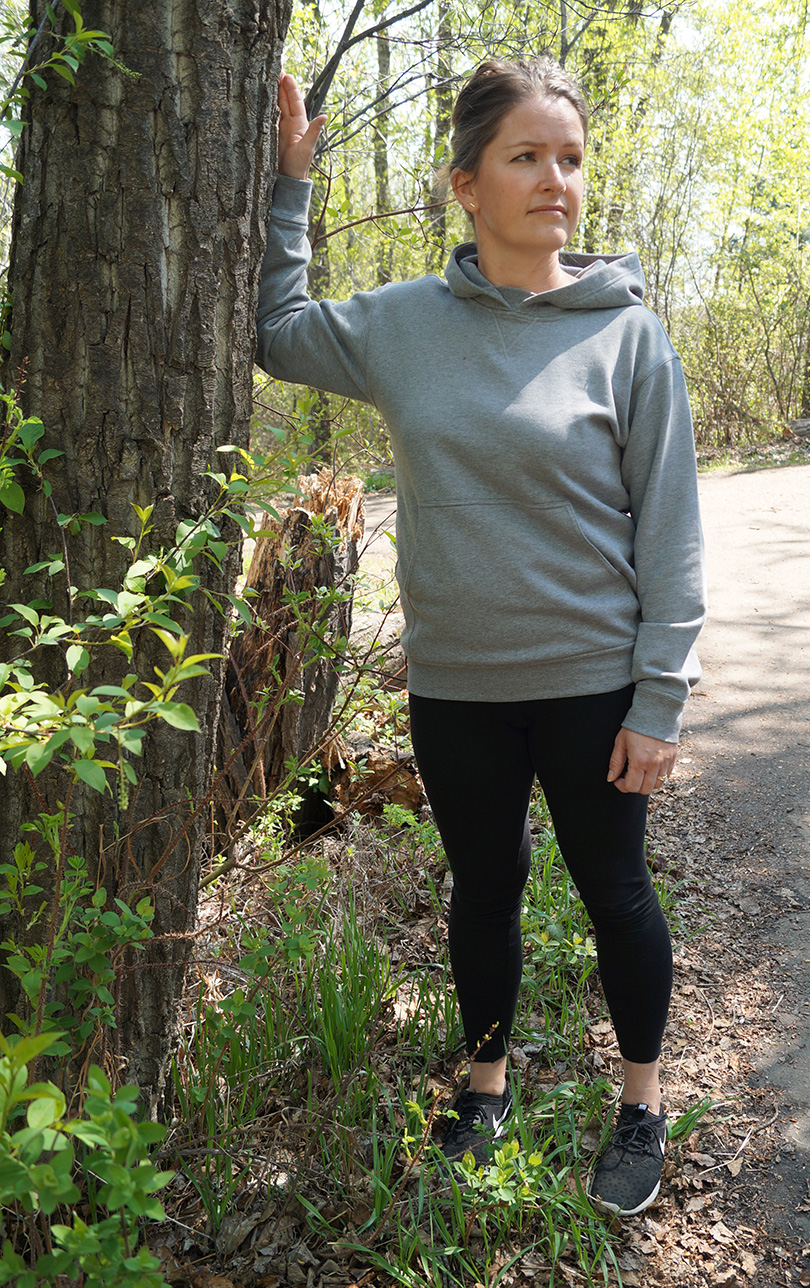
Shoulder stretch
Stand upright and lift one arm to the side, reaching shoulder height. Bend your elbow and place it against a wall or tree. Slowly rotate your body away from your elbow until you feel a gentle stretch in your chest area. Hold for 30 seconds, repeat 3 times on each side.
Hamstring stretch
Sit on a chair or bench, with one leg extended straight in front of you and the other leg bent. Lean forward slowly and gently, keeping your back as straight as possible (rest your hands on your knees). Hold for 30 seconds, and repeat 3 times on each leg.
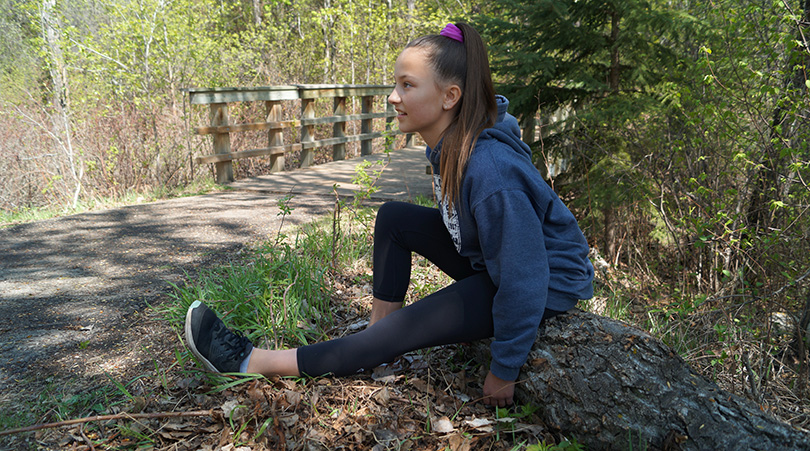
Thighs and knee stretch
Stand upright and bend one leg at the knee. Grab your foot and pull it toward your buttocks. Stand tall, push your pelvis forward, and push your thigh backward. Hold for 30 seconds on each side, repeat 3 times.

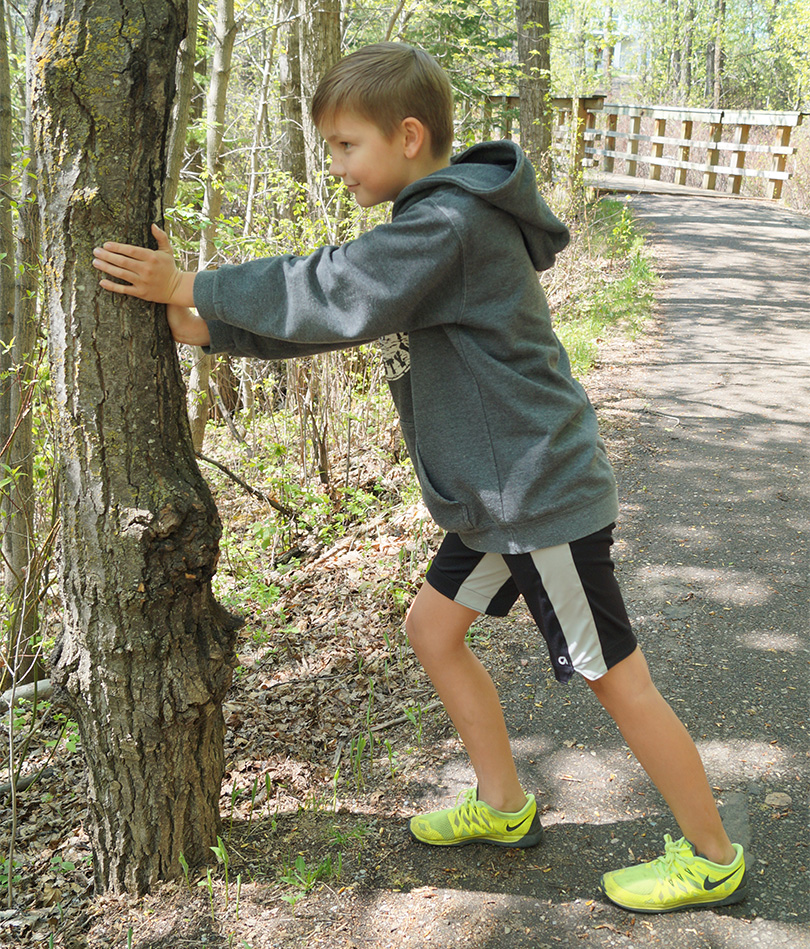
Calf stretch
Stand a couple of feet in front of a tree or wall. Lean forward into a plank position, with both heels on the ground and pointing forward. Hold for 30 seconds, repeat 3 times.
Take proactive steps towards injury-free gardening. Book a consultation with our experienced physiotherapists and get personalized advice tailored to your needs.
When Injuries Happen
Even if you’re mindful of your body, it’s still possible to experience injuries like sprains and strains while gardening. Sprains occur when ligaments are overstretched, and strains occur when muscles are overstretched. You might notice symptoms such as pain, tightness, bruising, or swelling, which can manifest immediately or appear hours or even days later.
The good news is that most of these injuries can be effectively treated at home. If the injury is new, here are some steps you can take using the ‘PRICE’ acronym as a helpful guide:
Protection: For the first two or three days, consider using a tensor bandage or a similar supportive wrap to protect the site. This can help limit movement and provide stability to the injured area.
Rest: It’s important to give the injured area time to rest and heal. However, gentle movement that doesn’t cause pain can actually aid in the recovery process. Find a balance between resting and keeping the area mobile.
Ice: Applying ice to the injured area three or four times a day for 15 minutes at a time can help reduce pain and swelling. Wrap the ice pack in a cloth to protect your skin and apply it to the affected area.
Compression: Combine ice with compression by using a tensor bandage to provide additional support and minimize inflammation. This can help reduce swelling and promote healing.
Elevation: Whenever possible, elevate the injured body part above the level of your heart. This assists in reducing swelling and enhancing blood circulation to the area.
Most of the time, symptoms will quickly subside on their own, but if they haven’t faded within three or four days, it’s time to see a physiotherapist. No physician’s referral is ever needed and services may be covered by your health insurance.
Are you experiencing pain or an injury as a result of gardening?
If you are experiencing persistent pain or discomfort, book a consultation or contact our team today to find out how we can help!
