Updated: November 14, 2022
When back pain hits, many of us gravitate to our couches thinking that we’ll feel better if we take it easy. However, a growing body of research shows that exercise, not rest, is the best medicine for chronic back pain.
Back pain is one of the most common reasons that people between the ages of 30 and 50 visit a doctor, or take time off work. With statistics like that, it seems like back pain is an inevitable part of adulthood, but it doesn’t have to be. Managing lower back pain is possible with regular exercise, stretching, healthy eating — and when needed, a trip to the physiotherapist.
12 Ways To Relieve Back Pain At Home
Whether you injured your back stretching, playing sports, or if you deal with chronic pain or arthritis, we’ve put together a complete guide for relieving back pain at home.
1. Stay active & keep moving.
Weak muscles are often to blame when people suffer back pain. While it may seem counterintuitive to work muscles that are in pain, it’s actually beneficial as long as you keep your activity or exercises pain-free. Physical activity strengthens muscles in the back and core, and improves flexibility in the spine, allowing us to move our bodies with greater ease and comfort.
Regular cardiovascular exercise helps to reduce back pain because cardio keeps muscles and joints loose, increases muscle strength, helps with weight loss, and brings blood flow to injured areas, which helps to reduce inflammation and encourage healing. Of course, a person should be careful about which exercise they do, as choosing an activity that is too high impact or too vigorous could result in their back pain worsening. Start slowly, something as simple as a daily walking routine will help immensely.
We’ve put together a list of outdoor activities that should keep you moving and help you not only strengthen your back muscles but also relieve pain.
Hit the trails in your local neighbourhood.
Lace up your walking or running shoes, grab a sweater or light coat, and hit the trails for a walk or jog (ideally on grass or the forest floor, as they’re easier on your lower back than asphalt).
Walking is a gentle, back-friendly workout that’s easy to do and safe for all fitness levels. Just like running, walking encourages the brain to release feel-good chemicals like serotonin and endorphins and improves flexibility and muscle strength over time.
Here in St. Albert, the Red Willow Trail system and Riverlot 56 offers 85 km of recreational trails for walking, running, and cycling. In Edmonton, take advantage of the 160 km of maintained River Valley trails, where users can walk paved paths or hike through the trees.
Get back to the playground!
It may surprise you to learn that there’s a free outdoor ‘gym’ in your neighbourhood: the schoolyard playground!
When you’re starting to feel less pain and are getting stronger, use the monkey bars for chin-ups to build strength in your upper back and core. Ensure your feet are touching the ground, tighten your stomach, lower yourself to extend your arms, take as much weight off your feet as you feel comfortable and lift your body (using your legs to help if needed or just hang from the bars with your elbows slightly bent will also build strength. Parallel bars found in some playgrounds are almost identical to the dip bars found in gyms and are another great way to build strength in your core. Stand between the bars and hold yourself up with your arms, making sure your feet are off the ground or just barely touching. If you’re able to, keep your feet slightly off the ground and gently swing your legs forward and back.
Take your bike out for an easy ride.
A nice bike ride on a beautiful day is a great way to get active and keep your body moving. Initially, you may want to avoid hills and try to stay close to home! Be sure to pay attention to your posture when biking, and make sure your seat and handlebars are set at the correct height for your body to stay as upright as possible and avoid any unnecessary or uncomfortable slouching.
Don’t forget your helmet!
Try cross-country skiing this winter.
Just because the weather gets colder doesn’t mean you have to stop being active! Cross-country skiing has become a popular winter activity for the residents of St. Albert.
Our very own Nordic Ski Club has a list of amazing local and nearby cross-country skiing trails you’re going to want to enjoy this winter.
Dust off your old pair of skates!
If you’re looking for a winter activity that’s fun for the whole family, there are a variety of beautiful and family-friendly skating rinks right here in St. Albert.
Don’t forget to stretch before and after you skate! If you’re new to skating we recommend taking it slow, a quick slip and fall on the ice can exacerbate your back pain.
2. Stretch and strengthen your muscles.
Stretching plays an important role in back pain management. For example, here are some simple stretches that can be done almost anywhere:
- Gentle twisting in a chair
- Bending over in a chair
- Cross one ankle over your other knee and lower your chest forward toward the higher knee, keeping your back straight
- Gently leaning back while standing, place your hands below the small of your back for support
- Lying on your back, knees bent and together, feet flat on the floor, dropping both knees together from side to side
- Lying on your back and bring one knee at a time to your chest
You’ll need to hold each stretch for approximately 15-30 seconds, 3-5 times each, and 2-3 times a day for best results. All stretches should be done slowly and gently — remember, stretching should not be painful!
However, many people with back pain also swear by Yoga as a strategy for both easing back pain in the moment, and building strength and flexibility to avoid back pain in future. Stretch out your yoga mat in a nearby park, in your living room, or on your backyard patio, and try these back-friendly poses:
Cat-Cow Pose

- Start on your hands and knees.
- Round your back as you lower your head to create a cat pose.
- Gradually arch your back and look up to create a cow pose.
Remember to breathe as you move between the poses, stretching your lower back and neck.
Big Toe Pose
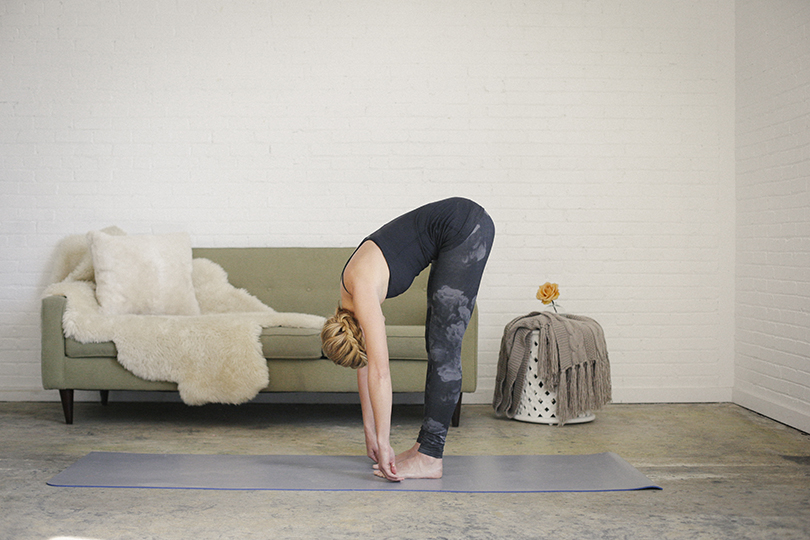
- Stand on your mat, with your feet six inches apart and parallel.
- Inhale and tighten your thigh muscles, then exhale as you reach for your toes, bending at the hip and being sure to keep your back straight – it’s okay if you have to bend your knees a little!
- Wrap your index and middle fingers around each big toe, then inhale and look up while still holding your toes.
- Exhale as you fold forward again and breathe deeply.
Bridge Pose
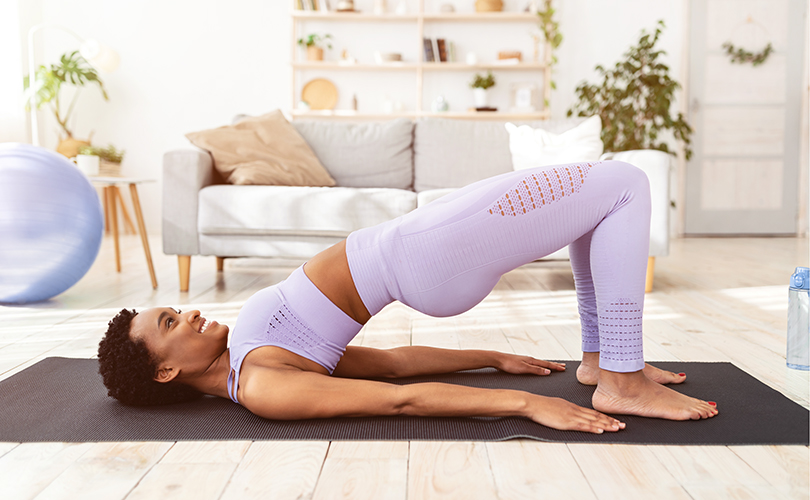
- Lie on your mat facing upwards with your knees bent, feet flat on the mat and hips shoulder width apart, with your arms beside you, palms down.
- Keeping your bum down on the mat, very slightly arch your lower back away from the mat and feel the muscles in your lower back tighten. While keeping the lower back muscles tight, squeeze your stomach muscles and tighten your glutes. This makes for a secure and stable core.
- While holding your core stable, lift your bum off the mat and clasp your hands together under your pelvis if able. Ideally, you want to lift high enough that you form a straight line with your body from the tip of your shoulder to your knees. Continue to keep your knees hip-width apart.
- Hold the bridge for a few breaths and then lower down slowly.
Listen to your body. If it hurts to lift your bum too high, lower your hips until you don’t feel pain.
3. Improve your posture.
In the world we live in, it is common to sit for much of the day, whether it is for driving, eating, working, socializing or even during our recreation time. This contributes to back pain being one of the most common issues we hear clients continue to struggle with. Although spending many hours of our day in a sedentary position may be unavoidable, there are proactive ways to neutralize the effects this has on our posture.
Many people complain of pain in the shoulders, neck, lower and upper regions of the back, and often it is due to poor posture. We have put together a basic, 10-minute practice of Pilates and Yoga exercises you can complete at home to help relieve your back pain. When incorporated into your daily routine, they help to:
- Stretch and strengthen muscles
- Rehydrate connective tissue
- Balance the nervous system
Even this small investment of time can help immensely if you are diligent each day at working for these key muscle groups. The Pilates exercises incorporate resistance training and core strengthening to work on posture and balance. The Yoga exercises focus on stretching, alignment and act as a release for some of the tension that builds up in the shoulders and back.
Important reminder: Do these exercises gently and never push into discomfort or pain. If your back pain is not improving after doing these for a week, then consult with your physiotherapist or physician.
You do not need any equipment for these exercises other than a mat on the floor. Just make sure you are relaxed and dressed in stretchy, comfortable clothing so that you can move easily!
Upward Facing Dog
Upward facing dog makes an excellent start to the routine as it stretches out the shoulders and back while bringing your awareness to issues with your posture:
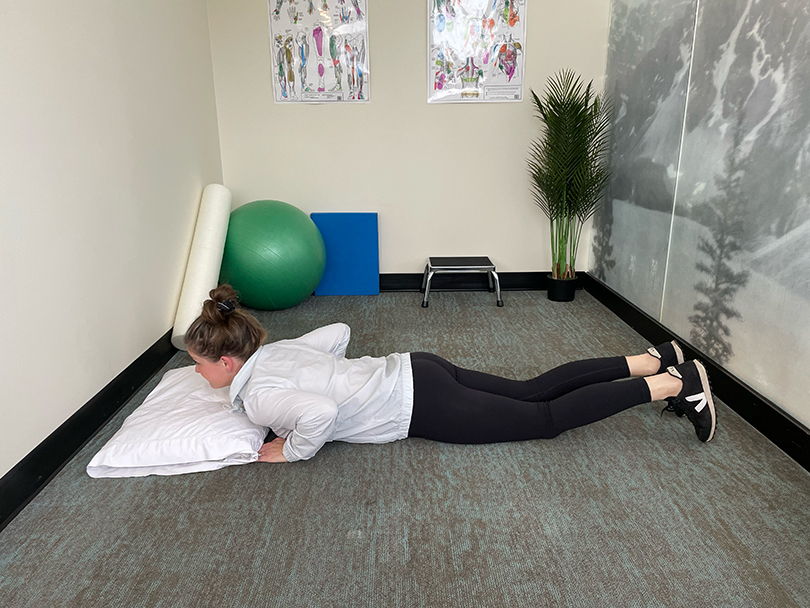
- Start by lying face down on your mat.
- Place your hands directly underneath your shoulders, and gently lift your head and chest off the mat while rolling your shoulders back. If at any time your back pain worsens when arching your back, lower yourself down and hold in the pain-free position.
- Gently squeeze your shoulder blades together and carefully lift the tips of your shoulders towards your lower back, which you will find brings your chest slightly upwards.
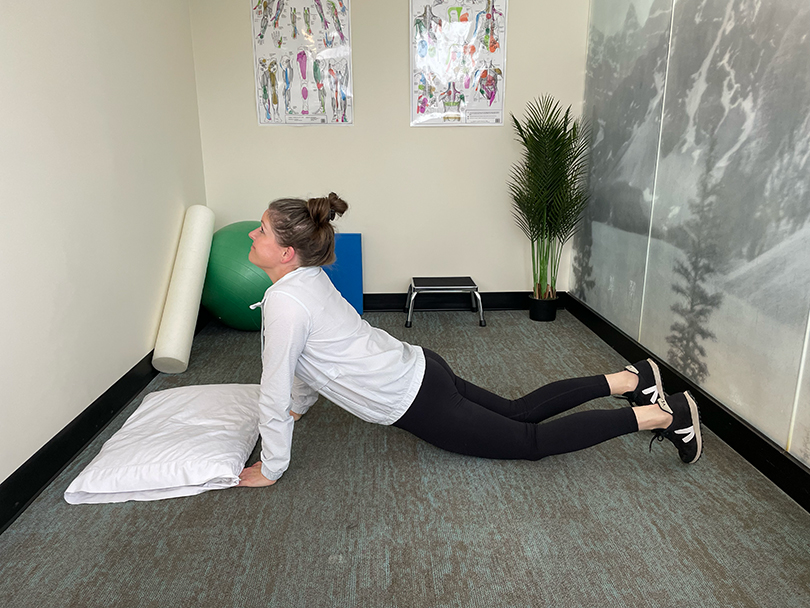
- If this continues to be pain-free, build on this motion by exerting a bit of pressure into your palms to lift your chest, sternum and ribs off the ground. Only go as far as you feel comfortable.
- Keep your chest and shoulders open at the top with a long, lifted neck. Your back should be so engaged that you feel like you could release your hands while keeping the chest upright.
Hold at the upright position for 15 seconds, and then roll back to the floor and repeat this 5 times.
Threaded Table Top
- From your previous position with the upward-facing dog, push yourself upwards onto your hands and knees, so that you are in what is called the “TableTop Position.” Your knees should be directly underneath your hips, hands directly underneath your shoulders, with a flat back and strong and straight neck.
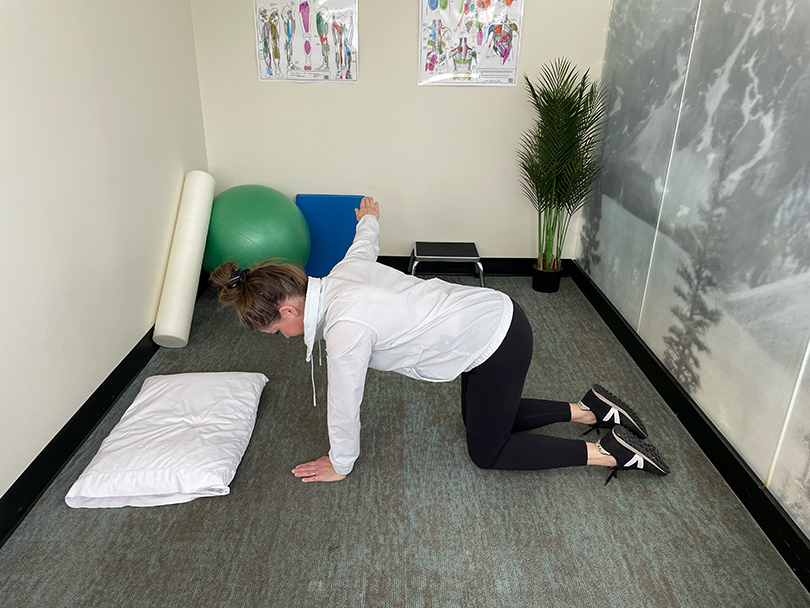
- Begin by stretching your right arm outwards to the side, and then right your arm further towards the ceiling so that your fingers are pointing at the ceiling and your upper body is rotated to the right. Then bring your right arm towards the ground and thread it underneath your left arm, turning your upper body to the left. It should reach far out towards the left, stretching out the upper back and shoulder blades. Try not to bend your spine, keeping it straight throughout the entire movement.
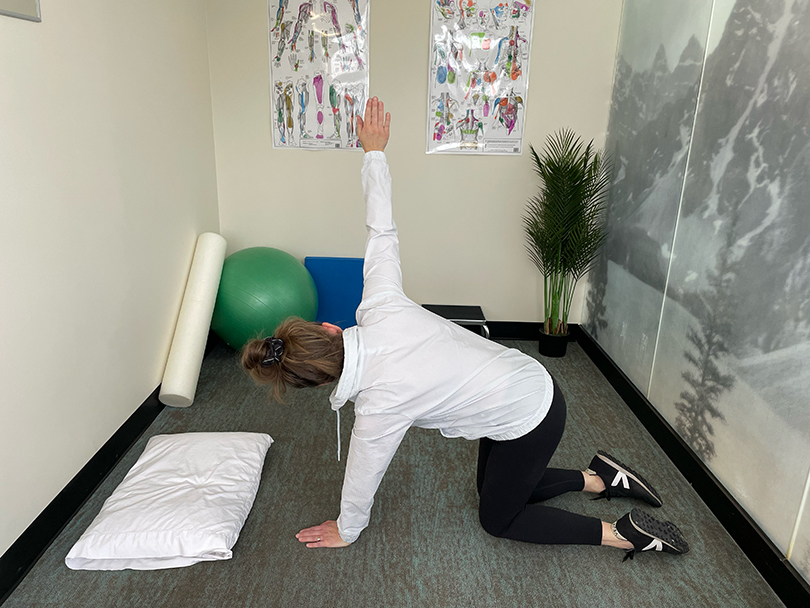
- Use your left hand to give you leverage to twist even deeper, and intensify the stretch when your body becomes comfortable.
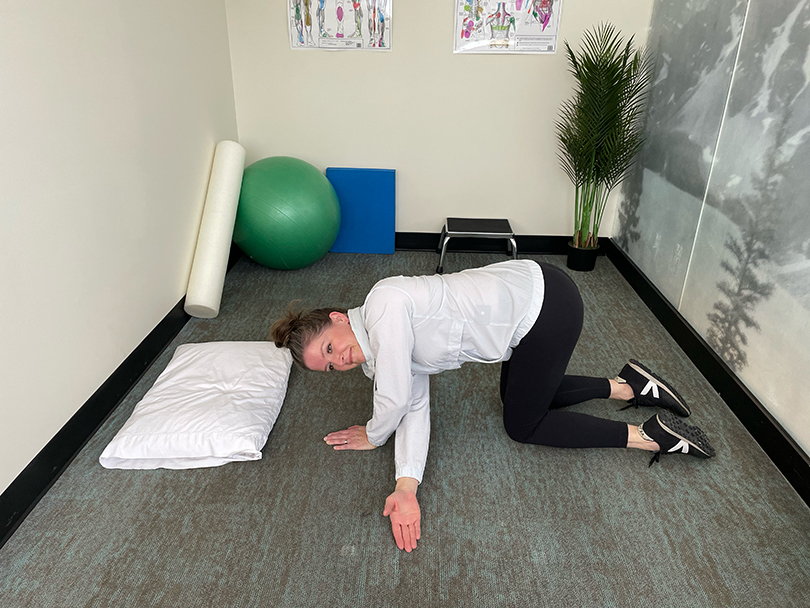
Take a couple of deep breaths and hold this position for a minute and a half. Then, repeat on the opposite side by bringing the left hand underneath the right shoulder.
Pelvic Tilt/Curl
- Lie on your mat facing upwards with your hands by your sides.
- Bend your knees to about 90 degrees so that your feet are flat on the ground. Position your knees and feet hip distance apart.
- Keeping your bum down on the mat, arch your low back away from the mat and feel the muscles in your low back tighten. This tilts the pelvis forwards. Hold this position for 10 seconds.
- Now, tighten your abdominal and glute muscles and push your spine down into the mat flattening or curling it, causing the pelvis to tilt backwards. Hold this pose for 10 seconds, and continue to breathe.
This works not only the core but also strengthens the quads, glutes and hamstrings. Do two sets of five lifts.
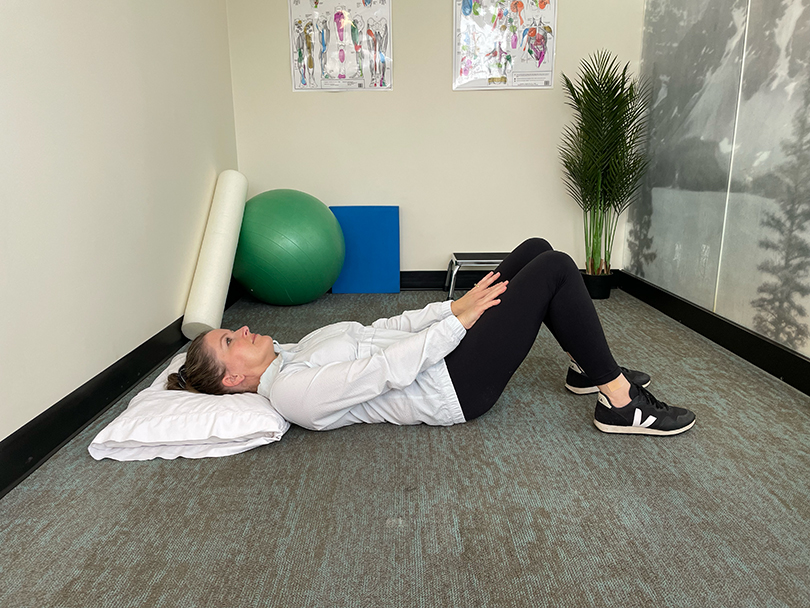
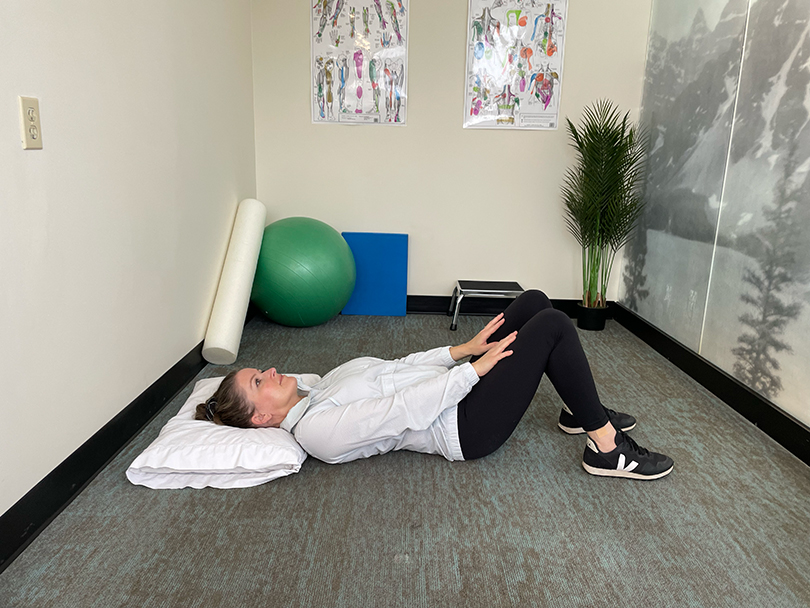
Table Top Tap-Downs
- Remain in the same position as the last exercise, lying on your back. However, this time with your hips and knees bent to 90 degrees so that your thighs are perpendicular to the floor and calves raised parallel to the ground, knees directly over the hips.
- Engage your abs by carefully scooping the lower belly and pushing the small of the back into the ground so that the exercise works the correct muscles (the same movement as with the pelvic curl).
- Lie on your hands so that they are in the small of your back. Ensure that you feel the compression of your spine into your hands.
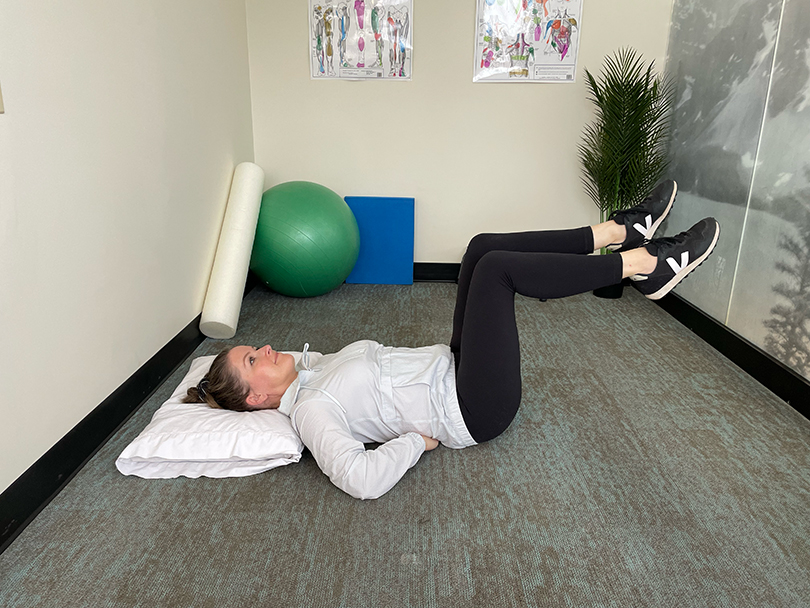
- Slowly lower your bent right leg, touching your right toes to the ground but not exerting any pressure.
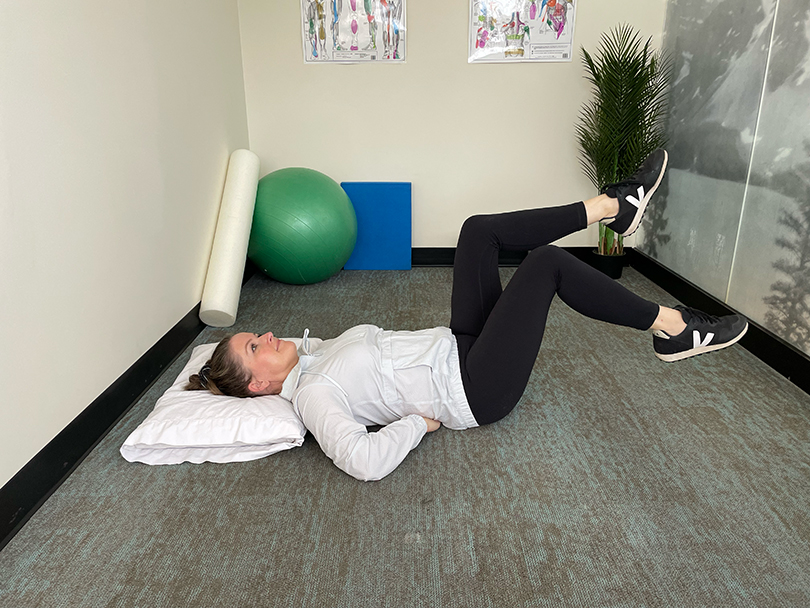
- Then, slowly raise your right leg back to the starting position and then repeat with the left. Make sure that you maintain the compression of your spine into your hands throughout the entire exercise. If you can’t, try this: start with both feet flat on the bed, with knees bent.
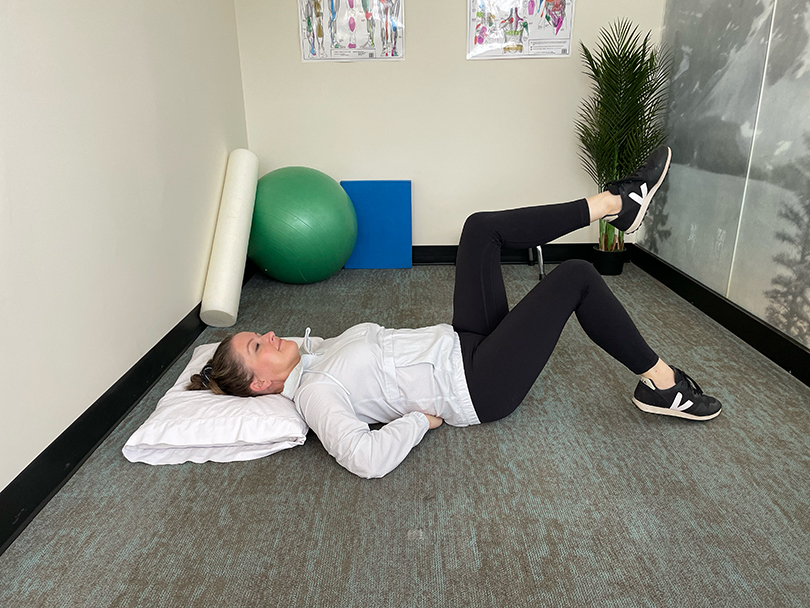
- While holding the spinal compression, slowly slide one of your heels along the mat and extend your leg until it is fully straight, then bend your knee and slide your heel towards your bum and bring your leg back to the starting position. Then do the same on the other leg. Try not to hold your breath — keep breathing!
Frequent breaks may need to be taken if you are not able to do this correctly. Both sides should take about 8 seconds to complete. Repeat this set on each side 5-10 times.
Pigeon Pose
To end your routine, a classic yoga stretch that is sure to make your lower back and hips happy and relaxed.
- Begin by kneeling on your mat or a stool if need be. Place your right leg in front of you, with your knee bent to 90 degrees and your thigh pointed outward so that your ankle and foot are pointing to the left.
- Position your left leg behind you, keeping it straight. Make sure your leg is not rotated outward but your thigh and knee cap facing straight downward. Point your foot and toes backwards.
- Gently tighten your stomach muscles and keep your body as vertical as possible. Try not to lean to the side and keep the stretch comfortable. Support yourself with your hands, use a stool to sit on and lean slightly forward if needed.
This quick routine incorporates a couple of easy, favourite Yoga and Pilates exercises that are beginner-friendly. It is always a good idea to consult a qualified yoga or pilates instructor or your physiotherapist if you are wanting to advance these exercises. We hope you have found them useful!
4. Try treating your back pain with heat and ice.
Traditionally, heat is used to increase the blood supply and relax muscles, but should not be used with new injuries and new inflammation as heat can make the inflammation worse. Ice, on the other hand, is used for acute conditions or new injuries where there is new and active inflammation (identified by redness, heat, and/or swelling) as cold reduces the inflammation.
For lower back pain, our physiotherapists recommend heat most of the time no matter how new the injury is unless swelling, heat, and redness can be observed in the back (indicating the injury and inflammation are superficial and close to the surface of the skin).
Most lower back pain is caused by injuries to tissues that are 2-3 inches under the skin and neither the cold from the ice nor the heat from a hot pack will penetrate deep enough to make a difference. Therefore, the reason we still recommend heat is because the injury will often cause the back muscles to spasm and tighten, which can be very painful and the heat can reduce this muscle tension and therefore reduce some of your back pain.
5. Consider natural at-home remedies for relieving back pain.
We don’t discourage people to try natural, at-home remedies for relieving back pain, such as essential oils, vitamins, a healthy diet, or anti-inflammatory teas, but we recommend they reach out to a Naturopath or Dietician they trust.
What we can recommend as physiotherapists and massage therapists that do fall within the scope of at-home-remedies are:
- Hot showers or baths
- Heating pads
- Prescribed stretches and exercises from a physiotherapist
- Over-the-counter medications and creams (e.g. Voltaren)
If you’re not sure what exercises will best help your back pain, contact our physiotherapists today for a customized treatment plan — no doctor referral is needed.
6. Avoid prolonged static positions.
With more of us working from home than ever before, we can often find ourselves in sedentary positions for longer periods of time. We’ve included some helpful tips to keep you moving during the day:
- Set a time to get up and move around every 20-30 minutes.
Make excuses to get out of your chair. - Stand when talking on the phone.
- Fill your beverage container/water bottle/coffee mug half full to force yourself to get up more often to refill.
- Use a standing desk (if possible).
- Go for a walk during your lunch break.
- Stretch in your chair by rotating your body right and left, pull each knee to your chest (one at a time), and lift your bum off the chair by pushing down on the armrests.
- Maintain proper posture while sitting.
If you’re interested in at-home exercises to relieve back pain, don’t hesitate to reach out and book an appointment with one of our physiotherapists.
7. Get more, better sleep.
A good night’s rest is oftentimes the best medicine! Getting the right amount of sleep can provide you with more energy to keep moving daily, but it can also help reduce stress and anxiety that can often trigger tense muscles leading to worse back pain.
We also recommend speaking with a physiotherapist about different sleeping positions, tricks, and techniques to help relieve back pain. For example, sleeping on your stomach can often cause more back pain or placing a pillow between your knees and ankles when sleeping on your side can help prevent any additional strain felt on your back.
8. Make more, healthy dietary changes.
Eating healthy and staying hydrated are also great ways to stay pain-free. Being overweight is a major contributor to chronic lower back pain due to the compressing forces and stresses that extra weight has on the spine’s ligaments, discs and joints.
Research has shown that certain foods, in addition to helping maintain a healthy weight, can actually reduce inflammation in the body. If lower back pain is an issue, try incorporating more healthy fats, fruits, and vegetables into your diet, while avoiding processed foods that are high in sugar and saturated fats, as these foods may actually encourage inflammation in the body. We recommend speaking to a Dietician you can trust for more information.
9. Quit smoking!
The link between smoking and chronic pain is due to the ability of nicotine and other chemicals to:
- Narrow blood vessels, reducing blood flow to the muscles, bones, and organs
- Decreases the delivery of oxygen-rich blood to your bones and tissues
- Decreasing blood and nutrient flow
- Slow healing (muscles, bones, discs, ligaments, tendons)
- Increase blood pressure
- Increase feelings of fatigue
Overall, smoking interferes with the brain circuitry that is involved in feelings of physical pain, which makes lower levels of pain feel more severe.
10. Ask your doctor about OTC medications and creams.
There are many different pain medications and ointments to help block the feelings of pain in your back. Our team recommends ointments such as Voltaren/Diclofenac cream.
However, if your pain is severe enough to cause you constant discomfort that interferes with your daily activities, we recommend speaking with your doctor about the different oral and other topical medications available.
11. Wear the right footwear for your feet.
Have you been wearing shoes with a lot more lift lately? What about a new pair of shoes you love but are completely flat, offering absolutely no arch support? To help avoid back pain (or at least limit the pain you’re already experiencing) keep the following tips in mind when it comes to your footwear:
- If you wear a heel, maintain a moderate height of an inch or less.
- Wear sneakers with good support and consider ditching casual sneakers like Converse.
- Keep in mind how well a shoe absorbs shock and cushions your feet. For shoes that will be used for standing and walking, make sure they have good cushioning.
- When shopping for sandals, purchase ones with good arch support and stay away from flat-footed flip-flops!
- Avoid minimalist shoes (e.g. barefoot shoes) for walking and standing.
12. Find ways to limit and reduce stress.
When people are stressed their muscles tend to tighten and even slight changes in breathing patterns can cause strain and tensions in your mid to lower back. Just another reason why mental health is so important to your body’s overall health!
However, the ability to easily manage or limit the amount of stress in one’s life is increasingly dependent on the individual, their personality, what they’re comfortable with, etc. Mental health is something we take seriously and we’ll always recommend seeing a psychologist if stress or anxiety is impacting your day-to-day life.
Some additional tips we like to recommend to help cope with stress include:
- Regular regimented exercise (e.g. resistance training, cardiovascular exercise, etc)
- Staying active
- Getting a healthy amount of sleep
- Eating right
- Enjoying nature
If you are increasing the amount of daily activity and exercise in your life, don’t forget to stretch and listen to your body.
Do you need help relieving your lower back pain?
Let us help you get back to pain-free living! If you have any questions about the different therapies and treatments we offer to minimize chronic back pain, or how we work with relieving a recent back injury, please contact our clinic or book an appointment online with one of our physiotherapists.